常见的数据增强操作有:按比例放大或缩小图片、旋转、平移、水平翻转、改变图像通道等。
1.按比例放大和缩小
? 扩展缩放只是改变图像的尺寸大小。OpenCV 提供的函数 cv2.resize()可以实现这个功能。图像的尺寸可以自己手动设置,也可以指定缩放因子。可以选择使用不同的插值方法。在缩放时我们推荐使用 cv2.INTER_AREA,在扩展时我们推荐使用 v2.INTER_CUBIC(慢) 和 v2.INTER_LINEAR。默认情况下所有改变图像尺寸大小的操作使用的插值方法都是 cv2.INTER_LINEAR。
|
1 2 3 4 5 6 7 8 9 |
# 缩小 -- 宽和高都缩小为原来的scale倍 def zoom_down(img,scale): img = cv2.resize(img,None,fx= scale,fy= scale,interpolation=cv2.INTER_CUBIC) return img
# 放大 -- 宽和高都放大为原来的scale倍 def zoom_up(img,scale): img = cv2.resize(img,None,fx= scale,fy= scale,interpolation=cv2.INTER_CUBIC) return img |
resize库中第二个参数是目标大小,例如如果我想把图片resize成300*300大小的,可以这么写:
|
1 |
img = cv2.resize(img,(300,300)) |
2.平移图像
平移就是将对象换一个位置。如果你要沿(x,y)方向移动,移动的距离是(tx,ty),你可以以下面的方式构建移动矩阵:

可以使用 Numpy 数组构建这个矩阵(数据类型是 np.float32),然后把它传给函数cv2.warpAffine()。
|
1 |
mat_translation = np.float32([[1, 0, 20], [0, 1, 30]]) |
例如上面是的矩阵是将图像往水平方向上移动20个像素点,竖直方向上移动30个像素点。
实例:
|
1 2 3 4 5 6 7 |
# 平移 -- 水平平移或竖直方向平移 def translation(img,tx,ty): height = img.shape[0] width = img.shape[1] mat_translation = np.float32([[1, 0, tx], [0, 1, ty]]) # 变换矩阵:设置平移变换所需的计算矩阵:2行3列 img = cv2.warpAffine(img, mat_translation, (width + tx, height + ty)) # 变换函数 return img |
我这里封装的tx和ty分别为水平和竖直方向需要移动的像素点数。
3.旋转图像
OpenCV 提供了一个函数:cv2.getRotationMatrix2D
|
1 2 3 4 5 6 7 8 9 |
# 旋转 def rotation(img,angle,scale): rows = img.shape[0] cols = img.shape[1] # 这里的第一个参数为旋转中心,第二个为旋转角度,第三个为旋转后的缩放因子 # 可以通过设置旋转中心,缩放因子,以及窗口大小来防止旋转后超出边界的问题 M = cv2.getRotationMatrix2D((cols / 2, rows / 2), angle, scale) # 向左旋转angle度并缩放为原来的scale倍 img = cv2.warpAffine(img, M, (cols, rows)) # 第三个参数是输出图像的尺寸中心 return img |
4.镜像变换
Opencv提供了cv2.flip()函数,可以第二个参数为1时为水平翻转,为0时垂直翻转。为了后面调用方便,我还是自己封装了一下。
|
1 2 3 4 |
# 镜像变换 def mirror(img,mode): img = cv2.flip(img, mode) # mode = 1 水平翻转 mode = 0 垂直翻 return img |
5.添加椒盐噪声
椒盐噪声为纯黑或纯白的像素点,随机生成。
|
1 2 3 4 5 6 7 8 9 10 11 12 13 14 |
# 添加椒盐噪声 def spiced_salt_noise(img,prob): output = np.zeros(img.shape,np.uint8) thres = 1 - prob for i in range(img.shape[0]): for j in range(img.shape[1]): rdn = random.random() if rdn < prob: output[i][j] = 0 # 椒盐噪声由纯黑和纯白的像素点随机组成 elif rdn > thres: output[i][j] = 255 else: output[i][j] = img[i][j] return output |
6.添加高斯噪声
与椒盐噪声不同,高斯噪声是彩色的,方差越大时噪声越大。
|
1 2 3 4 5 6 7 8 9 10 11 12 13 14 15 16 17 |
# 添加高斯噪声 def gasuss_noise(image, mean = 0, var = 0.01): ''' 添加高斯噪声 mean : 均值 var : 方差,方差越大越模糊 ''' image = np.array(image/255, dtype=float) noise = np.random.normal(mean, var ** 0.5, image.shape) out = image + noise if out.min() < 0: low_clip = -1. else: low_clip = 0. out = np.clip(out, low_clip, 1.0) out = np.uint8(out*255) return out |
7.模糊化
将图片模糊或平滑有多种算法,例如高斯模糊、中值模糊、均值模糊等,我这里使用一个比较普通的cv2.blur()实现。同样也是先封装方便我后面调用。
|
1 2 3 4 |
# 模糊 def blur(img,scale): img = cv2.blur(img,(scale,scale)) # scale越大越模糊 return img |
这里的scale其实就是滤波器的尺寸,一般取奇数,scale越大越模糊,
8.重新组合颜色通道
在opencv中,图像的通道顺序为BGR,也就是蓝绿红,可以改变成其他顺序以得到不同的效果。
|
1 2 3 4 5 6 7 |
# 重新组合颜色通道 def change_channel(img): b = cv2.split(img)[0] g = cv2.split(img)[1] r = cv2.split(img)[2] brg = cv2.merge([b, r, g]) # 可以自己改变组合顺序 return brg |
实例
我有以下几张测试图片:
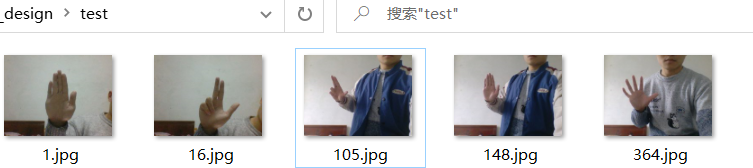
我希望随机地对这些图片进行一些变换,最终执行结果如下:
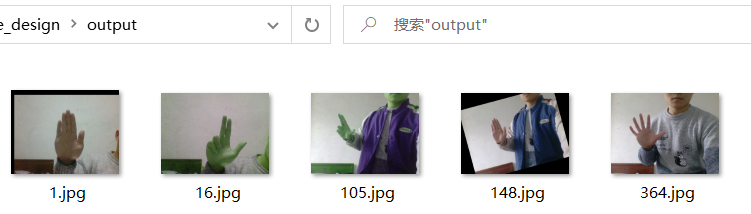
可以看到程序对我的图片随机进行了各种变换,我这里只是一次变换,读者也可以尝试对图片同时进行多种变换。
本次程序如下:
|
1 2 3 4 5 6 7 8 9 10 11 12 13 14 15 16 17 18 19 20 21 22 23 24 25 26 27 28 29 30 31 32 33 34 35 36 37 38 39 40 41 42 43 44 45 46 47 48 49 50 51 52 53 54 55 56 57 58 59 60 61 62 63 64 65 66 67 68 69 70 71 72 73 74 75 76 77 78 79 80 81 82 83 84 85 86 87 88 89 90 91 92 93 94 95 96 97 98 99 100 101 102 103 104 105 106 107 108 109 110 111 112 113 114 115 116 117 118 119 120 121 122 123 124 125 126 127 128 129 130 |
#!/usr/bin/env python # -*- coding: utf-8 -*- # @Time : 2022/2/18 16:30 # @Author : 若谷 # @File : Data_Augumentation.py # @Software: PyCharm import numpy as np import cv2 import random import os import sys
# 缩小 -- 宽和高都缩小为原来的scale倍 def zoom_down(img, scale): img = cv2.resize(img, None, fx=scale, fy=scale, interpolation=cv2.INTER_CUBIC) return img
# 放大 -- 宽和高都放大为原来的scale倍 def zoom_up(img, scale): img = cv2.resize(img, None, fx=scale, fy=scale, interpolation=cv2.INTER_CUBIC) return img
# 平移 -- 水平平移或竖直方向平移 def translation(img, tx, ty): height = img.shape[0] width = img.shape[1] mat_translation = np.float32([[1, 0, tx], [0, 1, ty]]) # 变换矩阵:设置平移变换所需的计算矩阵:2行3列 img = cv2.warpAffine(img, mat_translation, (width + tx, height + ty)) # 变换函数 return img
# 旋转 def rotation(img, angle, scale): rows = img.shape[0] cols = img.shape[1] # 这里的第一个参数为旋转中心,第二个为旋转角度,第三个为旋转后的缩放因子 # 可以通过设置旋转中心,缩放因子,以及窗口大小来防止旋转后超出边界的问题 M = cv2.getRotationMatrix2D((cols / 2, rows / 2), angle, scale) # 向左旋转angle度并缩放为原来的scale倍 img = cv2.warpAffine(img, M, (cols, rows)) # 第三个参数是输出图像的尺寸中心 return img
# 镜像变换 def mirror(img, mode): img = cv2.flip(img, mode) # mode = 1 水平翻转 mode = 0 垂直翻 return img
# 添加椒盐噪声 def spiced_salt_noise(img, prob): output = np.zeros(img.shape, np.uint8) thres = 1 - prob for i in range(img.shape[0]): for j in range(img.shape[1]): rdn = random.random() if rdn < prob: output[i][j] = 0 # 椒盐噪声由纯黑和纯白的像素点随机组成 elif rdn > thres: output[i][j] = 255 else: output[i][j] = img[i][j] return output
# 模糊 def blur(img, scale): img = cv2.blur(img, (scale, scale)) # scale越大越模糊 return img
# 添加高斯噪声 def gasuss_noise(image, mean=0, var=0.01): ''' 添加高斯噪声 mean : 均值 var : 方差,方差越大越模糊 ''' image = np.array(image / 255, dtype=float) noise = np.random.normal(mean, var ** 0.5, image.shape) out = image + noise if out.min() < 0: low_clip = -1. else: low_clip = 0. out = np.clip(out, low_clip, 1.0) out = np.uint8(out * 255) return out
# 重新组合颜色通道 def change_channel(img): b = cv2.split(img)[0] g = cv2.split(img)[1] r = cv2.split(img)[2] brg = cv2.merge([b, r, g]) # 可以自己改变组合顺序 return brg
# 随机进行以上操作 def Data_Augument(): for i in images_list: img = cv2.imread(image_dir+i) # 图片路径+图片名字 cv2.imshow('img',img) functions = [('zoom_down', [img, 0.8]), # 第一个参数为函数名,后面为函数调用时的参数 ('zoom_up', [img, 1.2]), ('translation', [img, 20, 30]), ('rotation', [img, 15, 0.9]), ('mirror', [img, 1]), ('spiced_salt_noise', [img, 0.01]), ('blur', [img, 5]), ('gasuss_noise', [img, 0, 0.01]), ('change_channel', [img])] choice = random.choice(functions) # 随机选择一个函数执行 this_module = sys.modules[__name__] # 当前文件
res = getattr(this_module, choice[0])(*choice[1]) cv2.imwrite(output_dir + i, res)
if __name__ == '__main__': image_dir = './test/' # 源图片路径 images_list = os.listdir(image_dir) nums = len(os.listdir(image_dir)) print('found %d pictures' % nums) output_dir = './output/' # 图像变换后的保存路径 Data_Augument() # 执行 print('finished!') |
总结
还有其他很多的数据增强操作,例如随机裁剪图像、添加颜色扰动等等。另外也有其他库可以进行这些操作,例如Keras中的图片预处理process库。我这种是离线式的,希望能将变换后的图片保存下来。