基于python3 讯飞webAPI语音识别 接口调用的实现。
一、环境
1、注册讯飞平台账号:讯飞平台网址
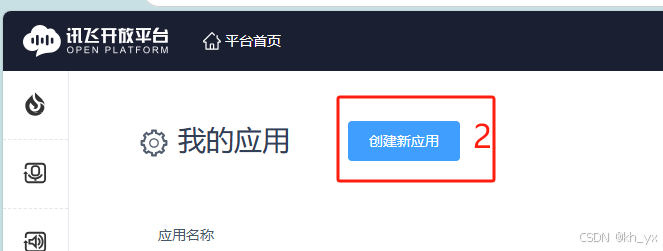
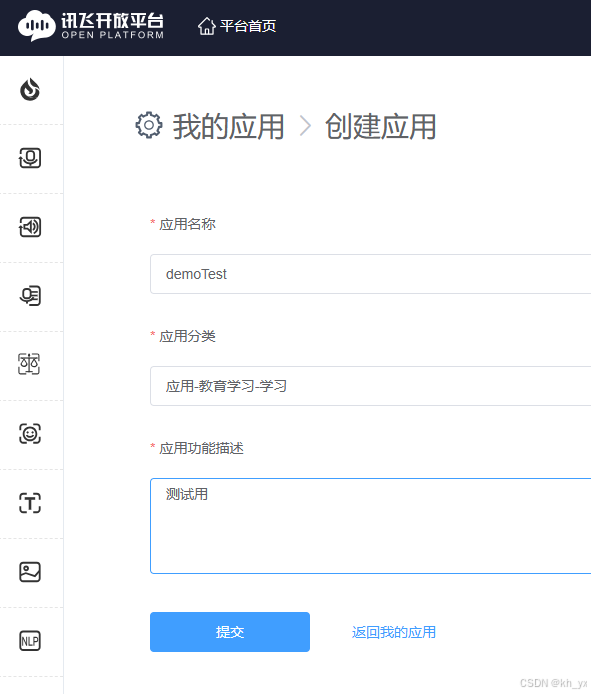
2、进入控制台并创建应用

 |
|
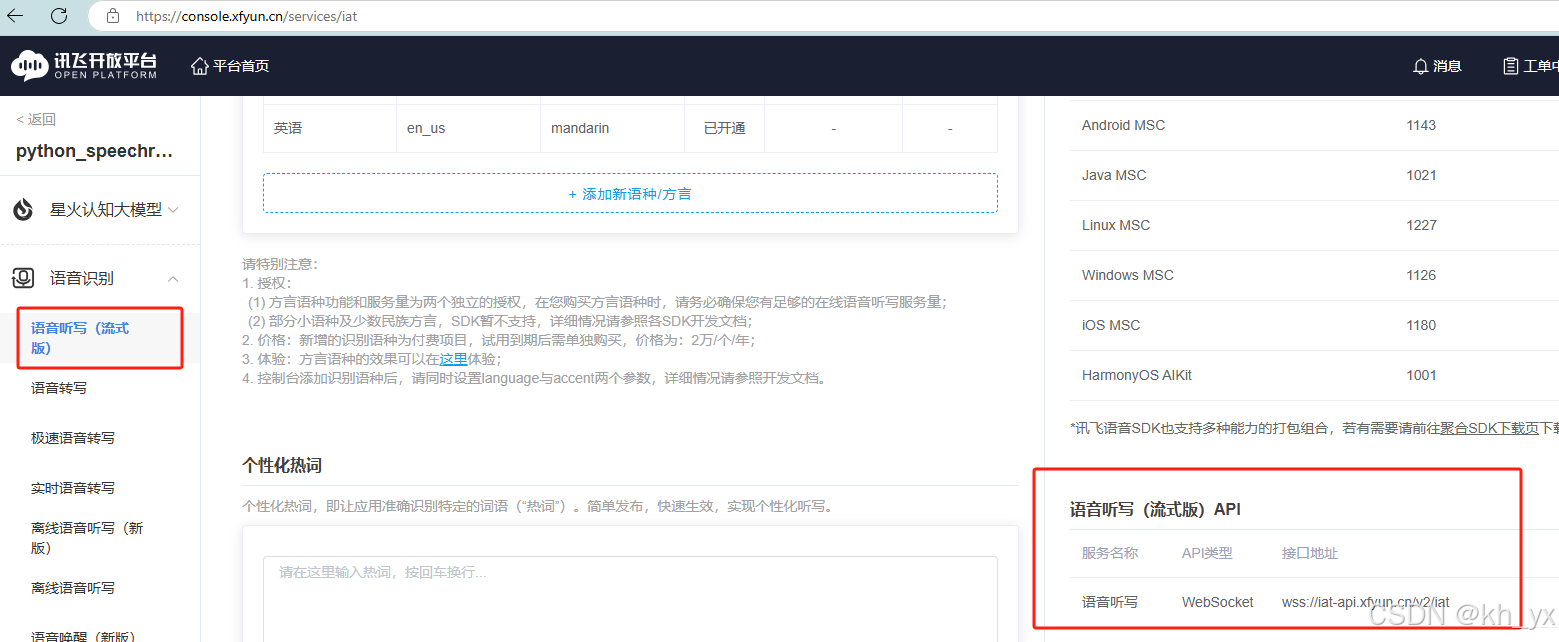
3、进入应用后点击右侧语音识别-语音听写,系统会生成服务端口认证信息APPID、APISecret、APIKey,后面调用接口的时候会用到,往下滑动可看到接口地址

二、引入库
需要提前安装所需的库
使用pip安装
python -m pip install websocket-client
|
1 2 3 4 5 6 7 8 9 10 11 12 13 |
import websocket import datetime import hashlib import base64 import hmac import json from urllib.parse import urlencode import time import ssl from wsgiref.handlers import format_date_time from datetime import datetime from time import mktime import _thread as thread |
三、代码实例
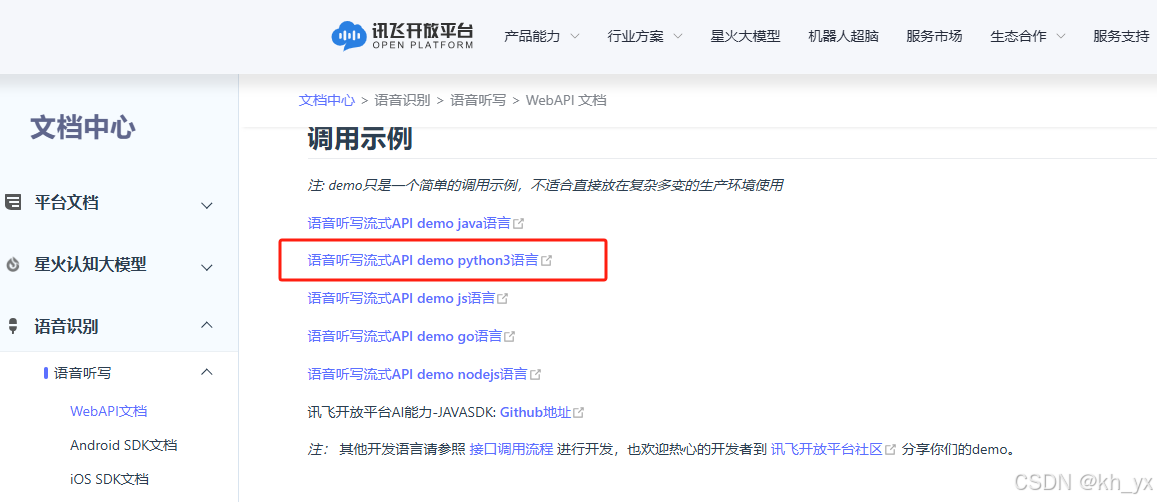
1、进入讯飞资料文档中心:语音听写(流式版)WebAPI 文档 | 讯飞开放平台文档中心
下载python3 demo
demo中的on_message方法需要小小的改动,在输出完整的数据之前先进行判断是否已经是最后一帧了。已在下面的代码中体现
下列代码中的APPID、APISecret、APIKey、url根据标题一中3步骤的内容更改
|
1 2 3 4 5 6 7 8 9 10 11 12 13 14 15 16 17 18 19 20 21 22 23 24 25 26 27 28 29 30 31 32 33 34 35 36 37 38 39 40 41 42 43 44 45 46 47 48 49 50 51 52 53 54 55 56 57 58 59 60 61 62 63 64 65 66 67 68 69 70 71 72 73 74 75 76 77 78 79 80 81 82 83 84 85 86 87 88 89 90 91 92 93 94 95 96 97 98 99 100 101 102 103 104 105 106 107 108 109 110 111 112 113 114 115 116 117 118 119 120 121 122 123 124 125 126 127 128 129 130 131 132 133 134 135 136 137 138 139 140 141 142 143 144 145 146 147 148 149 150 151 152 153 154 155 156 157 158 159 160 161 162 163 164 165 166 167 168 169 170 |
import websocket import datetime import hashlib import base64 import hmac import json from urllib.parse import urlencode import time import ssl from wsgiref.handlers import format_date_time from datetime import datetime from time import mktime import _thread as thread
STATUS_FIRST_FRAME = 0 # 第一帧的标识 STATUS_CONTINUE_FRAME = 1 # 中间帧标识 STATUS_LAST_FRAME = 2 # 最后一帧的标识
class Ws_Param(object): # 初始化 def __init__(self, APPID, APIKey, APISecret, AudioFile): self.APPID = APPID self.APIKey = APIKey self.APISecret = APISecret self.AudioFile = AudioFile
# 公共参数(common) self.CommonArgs = {"app_id": self.APPID} # 业务参数(business),更多个性化参数可在官网查看 self.BusinessArgs = {"domain": "iat", "language": "zh_cn", "accent": "mandarin", "vinfo":1,"vad_eos":10000}
# 生成url def create_url(self): url = 'wss://ws-api.xfyun.cn/v2/iat' # 生成RFC1123格式的时间戳 now = datetime.now() date = format_date_time(mktime(now.timetuple()))
# 拼接字符串 signature_origin = "host: " + "ws-api.xfyun.cn" + "\n" signature_origin += "date: " + date + "\n" signature_origin += "GET " + "/v2/iat " + "HTTP/1.1" # 进行hmac-sha256进行加密 signature_sha = hmac.new(self.APISecret.encode('utf-8'), signature_origin.encode('utf-8'), digestmod=hashlib.sha256).digest() signature_sha = base64.b64encode(signature_sha).decode(encoding='utf-8')
authorization_origin = "api_key=\"%s\", algorithm=\"%s\", headers=\"%s\", signature=\"%s\"" % ( self.APIKey, "hmac-sha256", "host date request-line", signature_sha) authorization = base64.b64encode(authorization_origin.encode('utf-8')).decode(encoding='utf-8') # 将请求的鉴权参数组合为字典 v = { "authorization": authorization, "date": date, "host": "ws-api.xfyun.cn" } # 拼接鉴权参数,生成url url = url + '?' + urlencode(v) # print("date: ",date) # print("v: ",v) # 此处打印出建立连接时候的url,参考本demo的时候可取消上方打印的注释,比对相同参数时生成的url与自己代码生成的url是否一致 # print('websocket url :', url) return url
# 收到websocket消息的处理 all_results = "" def on_message(ws, message): global all_results try: code = json.loads(message)["code"] sid = json.loads(message)["sid"] if code != 0: errMsg = json.loads(message)["message"] print("sid:%s call error:%s code is:%s" % (sid, errMsg, code))
else: data = json.loads(message)["data"]["result"]["ws"] # print(json.loads(message)) result = "" for i in data: tm = str(i["bg"]) for w in i["cw"]: result += w["w"] # 添加到全局结果 all_results += result
# 检查是否为最后一帧 if "status" in json.loads(message)["data"]: if json.loads(message)["data"]["status"] == 2: # 判断是否为最后一帧 print("sid:%s call success!, combined data is: %s" % (sid, all_results)) # 添加句号到最后 all_results = "" # 清空全局结果 #print("sid:%s call success!,data is:%s" % (sid, json.dumps(data, ensure_ascii=False))) #print("sid:%s call success!,data is:%s" % (sid, result)) except Exception as e: print("receive msg,but parse exception:", e)
# 收到websocket错误的处理 def on_error(ws, error): print("### error:", error)
# 收到websocket关闭的处理 def on_close(ws,a,b): print("### closed ###")
# 收到websocket连接建立的处理 def on_open(ws): def run(*args): frameSize = 8000 # 每一帧的音频大小 intervel = 0.04 # 发送音频间隔(单位:s) status = STATUS_FIRST_FRAME # 音频的状态信息,标识音频是第一帧,还是中间帧、最后一帧
with open(wsParam.AudioFile, "rb") as fp: while True: buf = fp.read(frameSize) # 文件结束 if not buf: status = STATUS_LAST_FRAME # 第一帧处理 # 发送第一帧音频,带business 参数 # appid 必须带上,只需第一帧发送 if status == STATUS_FIRST_FRAME:
d = {"common": wsParam.CommonArgs, "business": wsParam.BusinessArgs, "data": {"status": 0, "format": "audio/L16;rate=16000", "audio": str(base64.b64encode(buf), 'utf-8'), "encoding": "raw"}} d = json.dumps(d) ws.send(d) status = STATUS_CONTINUE_FRAME # 中间帧处理 elif status == STATUS_CONTINUE_FRAME: d = {"data": {"status": 1, "format": "audio/L16;rate=16000", "audio": str(base64.b64encode(buf), 'utf-8'), "encoding": "raw"}} ws.send(json.dumps(d)) # 最后一帧处理 elif status == STATUS_LAST_FRAME: d = {"data": {"status": 2, "format": "audio/L16;rate=16000", "audio": str(base64.b64encode(buf), 'utf-8'), "encoding": "raw"}} ws.send(json.dumps(d)) time.sleep(1) break # 模拟音频采样间隔 time.sleep(intervel) ws.close()
thread.start_new_thread(run, ())
if __name__ == "__main__": # 测试时候在此处正确填写相关信息即可运行 time1 = datetime.now() wsParam = Ws_Param(APPID='xxx', APISecret='xxx', APIKey='xxx', AudioFile=r'C:\Users\1\Downloads\iat_pcm_8k.pcm') websocket.enableTrace(False) wsUrl = wsParam.create_url() ws = websocket.WebSocketApp(wsUrl, on_message=on_message, on_error=on_error, on_close=on_close) ws.on_open = on_open ws.run_forever(sslopt={"cert_reqs": ssl.CERT_NONE}) time2 = datetime.now() print(time2-time1) |
四、运行结果

五、总结
ModuleNotFoundError: No module named 'websocket'
AttributeError: module 'websocket' has no attribute 'enableTrace'
以上错误需要安装websocket-client库即可解决