加载mnist
|
1
2
3
4
5
6
7
8
9
10
11
12
13
14
15
16
17
18
19
20
21
22
23
24
25
26
27
28
29
30
31
32
33
34
35
36
37
38
39
40
41
42
43
44
45
46
47
|
import numpy
def loadMnist() -> (numpy.ndarray,numpy.ndarray,numpy.ndarray,numpy.ndarray):
"""
:return: (xTrain,yTrain,xTest,yTest)
"""
global _TRAIN_SAMPLE_CNT
global PIC_H
global PIC_W
global _TEST_SAMPLE_CNT
global PIC_HW
from tensorflow import keras #修改点: tensorflow:2.6.2,keras:2.6.0 此版本下, import keras 换成 from tensorflow import keras
import tensorflow
print(f"keras.__version__:{keras.__version__}")#2.6.0
print(f"tensorflow.__version__:{tensorflow.__version__}")#2.6.2
# avatar_img_path = "/kaggle/working/data"
import os
import cv2
xTrain:numpy.ndarray; label_train:numpy.ndarray; xTest:numpy.ndarray; label_test:numpy.ndarray
yTrain:numpy.ndarray; yTest:numpy.ndarray
#%userprofile%\.keras\datasets\mnist.npz
(xTrain, label_train), (xTest, label_test) = keras.datasets.mnist.load_data()
# x_train.shape,y_train.shape, x_test.shape, label_test.shape
# (60000, 28, 28), (60000,), (10000, 28, 28), (10000,)
_TRAIN_SAMPLE_CNT,PIC_H,PIC_W=xTrain.shape
PIC_HW=PIC_H*PIC_W
xTrain=xTrain.reshape((-1, PIC_H * PIC_W))
xTest=xTest.reshape((-1, PIC_H * PIC_W))
_TEST_SAMPLE_CNT=label_test.shape[0]
from sklearn import preprocessing
#pytorch 的 y 不需要 oneHot
#_label_train是1列多行的样子. _label_train.shape : (60000, 1)
yTrain=label_train
# y_train.shape:(60000) ; y_train.dtype: dtype('int')
CLASS_CNT=yTrain.shape[0]
yTest=label_test
# y_test.shape:(10000) ; y_test.dtype: dtype('int')
xTrainMinMaxScaler:preprocessing.MinMaxScaler; xTestMinMaxScaler:preprocessing.MinMaxScaler
xTrainMinMaxScaler=preprocessing.MinMaxScaler()
xTestMinMaxScaler=preprocessing.MinMaxScaler()
# x_train.dtype: dtype('uint8') -> dtype('float64')
xTrain=xTrainMinMaxScaler.fit_transform(xTrain)
# x_test.dtype: dtype('uint8') -> dtype('float64')
xTest = xTestMinMaxScaler.fit_transform(xTest)
return (xTrain,yTrain,xTest,yTest)
|
|
1
|
xTrain:torch.Tensor;yTrain:torch.Tensor; xTest:torch.Tensor; yTest:torch.Tensor(xTrain,yTrain,xTest,yTest)=loadMnist()
|
plotly 显示多个mnist样本
|
1
2
3
4
5
6
7
8
9
10
11
12
|
import plotly.express
import plotly.graph_objects
import plotly.subplots
import numpy
xTrain:numpy.ndarray=numpy.random.random((2,28,28))
#xTrain[0].shape:(28,28)
#fig:plotly.graph_objects.Figure=None
fig=plotly.subplots.make_subplots(rows=1,cols=2,shared_xaxes=True,shared_yaxes=True) #共1行2列
fig.add_trace(trace=plotly.express.imshow(img=xTrain[0]).data[0],row=1,col=1) #第1行第1列
fig.add_trace(trace=plotly.express.imshow(img=xTrain[1]).data[0],row=1,col=2) #第1行第2列
fig.show()
#参数row、col从1开始, 不是从0开始的
|
plotly 显示单个图片
|
1
2
3
4
5
6
7
|
import numpy
xTrain:numpy.ndarray=numpy.random.random((2,28,28))
#xTrain[0].shape:(28,28)
import plotly.express
import plotly.graph_objects
plotly.express.imshow(img=xTrain[0]).show()
#其中plotly.express.imshow(img=xTrain[0]) 的类型是 plotly.graph_objects.Figure
|
xTrain[0]显示如下:
mnist单样本分拆显示
|
1
2
3
4
5
6
7
8
9
10
|
#mnist单样本分割 分割成4*4小格子显示出来, 以确认分割的对不对。 以下代码是正确的分割。 主要逻辑是: (7,4,7,4) [h, :, w, :]
fig:plotly.graph_objects.Figure=plotly.subplots.make_subplots(rows=7,cols=7,shared_xaxes=True,shared_yaxes=True,vertical_spacing=0,horizontal_spacing=0)
xTrain0Img:torch.Tensor=xTrain[0].reshape((PIC_H,PIC_W))
plotly.express.imshow(img=xTrain0Img).show()
xTrain0ImgCells:torch.Tensor=xTrain0Img.reshape((7,4,7,4))
for h in range(7):
for w in range(7):
print(f"h,w:{h},{w}")
fig.add_trace(trace=plotly.express.imshow(xTrain0ImgCells[h,:,w,:]).data[0],col=h+1,row=w+1)
fig.show()
|
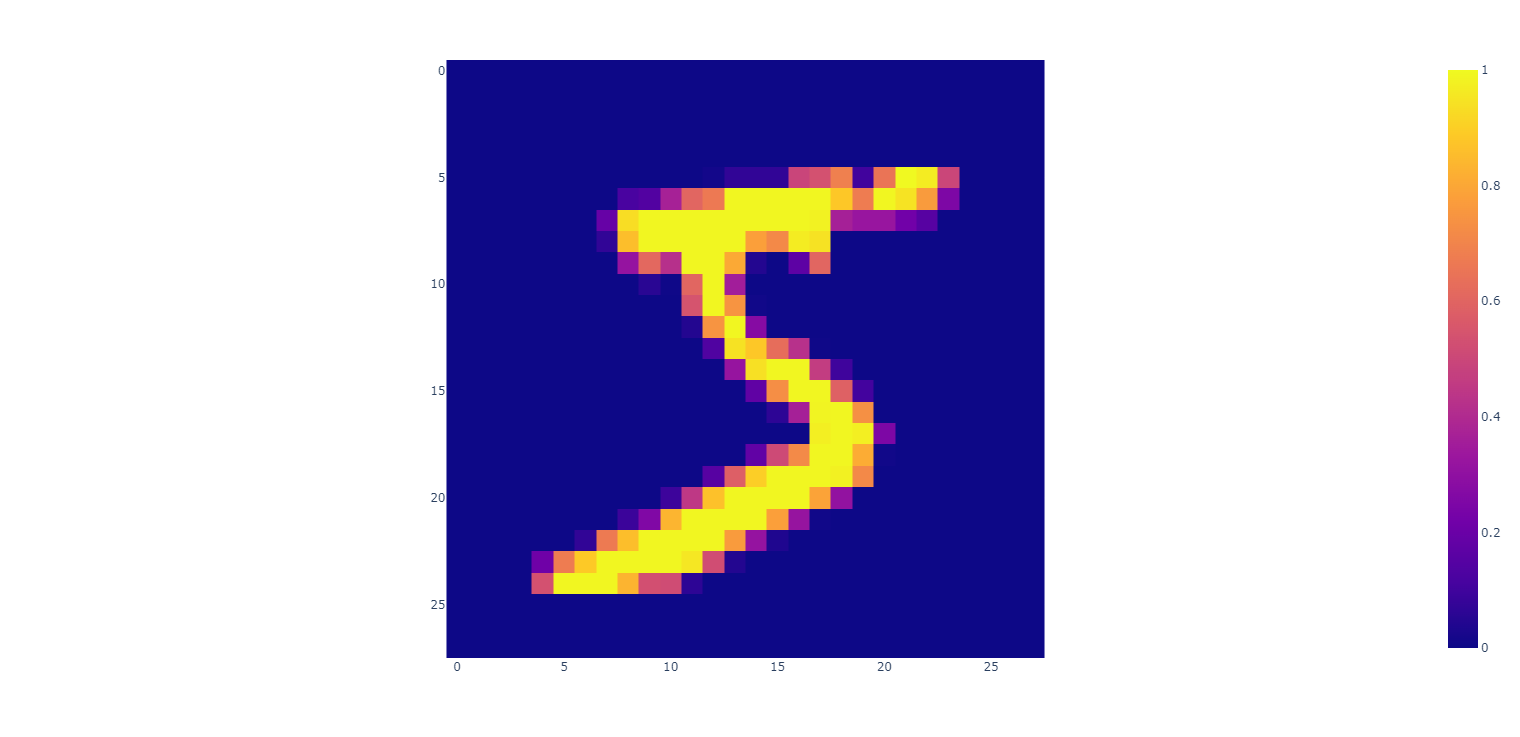
mnist单样本分拆显示结果: 由此图可知 (7,4,7,4) [h, :, w, :] 是正常的取相邻的像素点出而形成的4*4的小方格 ,这正是所需要的
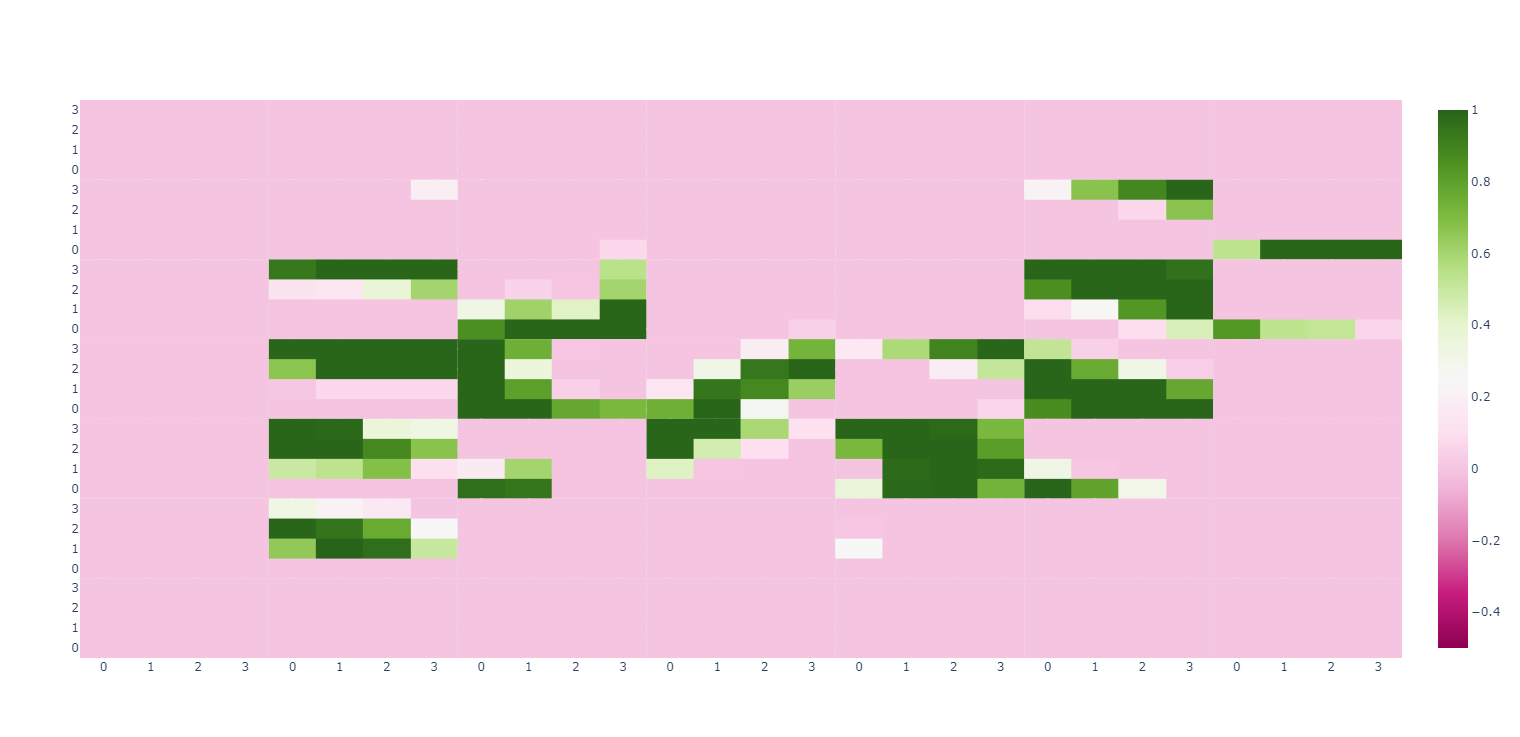
上图显示 的 横坐标拉伸比例大于纵坐标 所以看起来像一个被拉横了的手写数字5 ,如果能让plotly把横纵拉伸比例设为相等 上图会更像手写数字5
可以用torch.swapdim进一步改成以下代码
|
1
2
3
4
5
6
7
8
9
10
11
12
13
14
15
|
"""
mnist单样本分割 分割成4*4小格子显示出来, 重点逻辑是: (7, 4, 7, 4) [h, :, w, :]
:param xTrain:
:return:
"""
fig: plotly.graph_objects.Figure = plotly.subplots.make_subplots(rows=7, cols=7, shared_xaxes=True, shared_yaxes=True, vertical_spacing=0, horizontal_spacing=0)
xTrain0Img: torch.Tensor = xTrain[0].reshape((PIC_H, PIC_W))
plotly.express.imshow(img=xTrain0Img).show()
xTrain0ImgCells: torch.Tensor = xTrain0Img.reshape((7, 4, 7, 4))
xTrain0ImgCells=torch.swapdims(input=xTrain0ImgCells,dim0=1,dim1=2)#交换 (7, 4, 7, 4) 维度1、维度2 即 (0:7, 1:4, 2:7, 3:4)
for h in range(7):
for w in range(7):
print(f"h,w:{h},{w}")
fig.add_trace(trace=plotly.express.imshow(xTrain0ImgCells[h, w]).data[0], col=h + 1, row=w + 1) # [h, w, :, :] 或 [h, w]
fig.show()
|
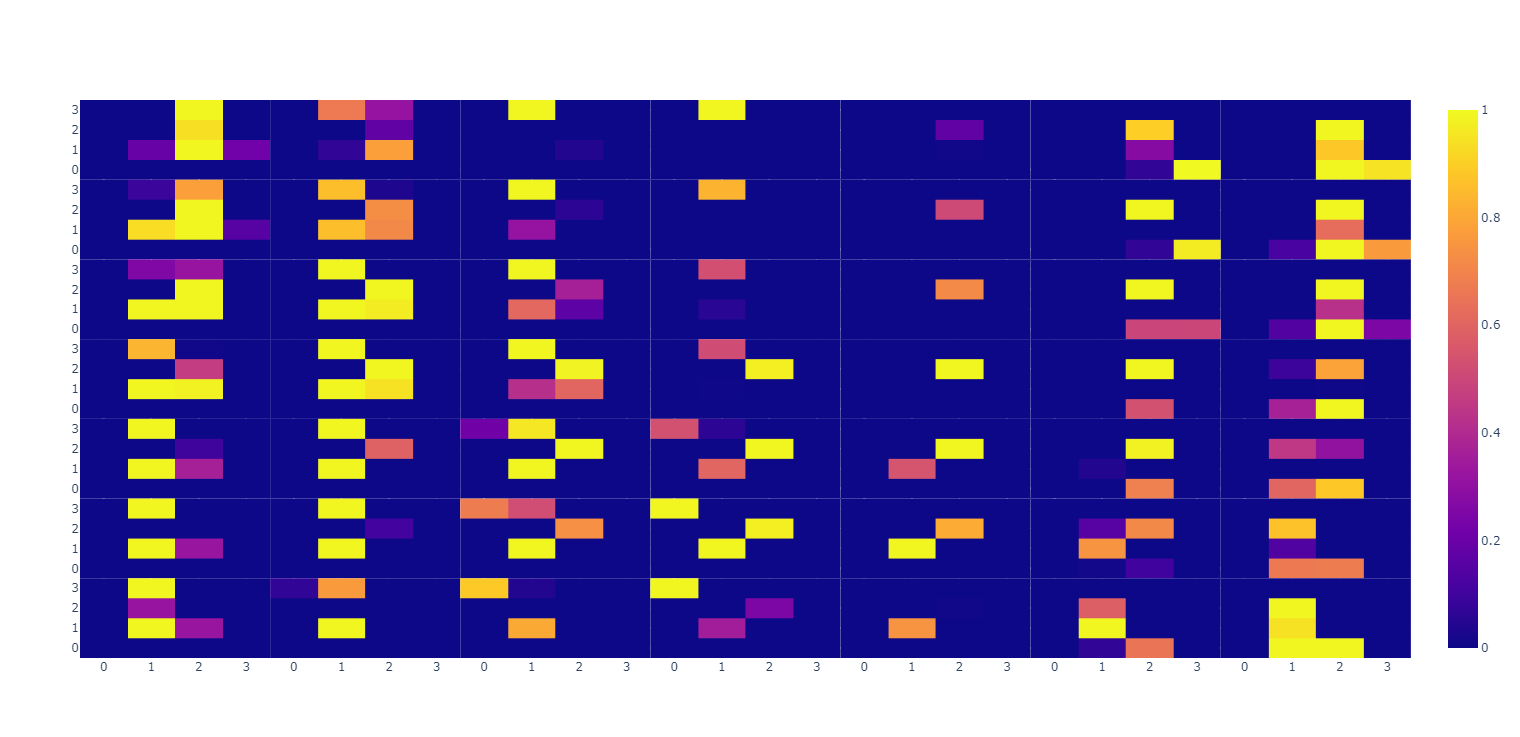
mnist单样本错误的分拆显示
以下 mnist单样本错误的分拆显示:
|
1
2
3
4
5
6
7
8
9
10
|
# mnist单样本错误的分拆显示:
fig: plotly.graph_objects.Figure = plotly.subplots.make_subplots(rows=7, cols=7, shared_xaxes=True, shared_yaxes=True, vertical_spacing=0, horizontal_spacing=0)
xTrain0Img: torch.Tensor = xTrain[0].reshape((PIC_H, PIC_W))
plotly.express.imshow(img=xTrain0Img).show()
xTrain0ImgCells: torch.Tensor = xTrain0Img.reshape((4,7, 4, 7)) #原本是: (7,4,7,4)
for h in range(7):
for w in range(7):
print(f"h,w:{h},{w}")
fig.add_trace(trace=plotly.express.imshow(xTrain0ImgCells[:, h, :, w]).data[0], col=h + 1, row=w + 1) #原本是: [h,:,w,:]
fig.show()
|
其结果为: 由此图可知 (4,7, 4, 7) [:, h, :, w] 是间隔的取出而形成的4*4的小方格
|