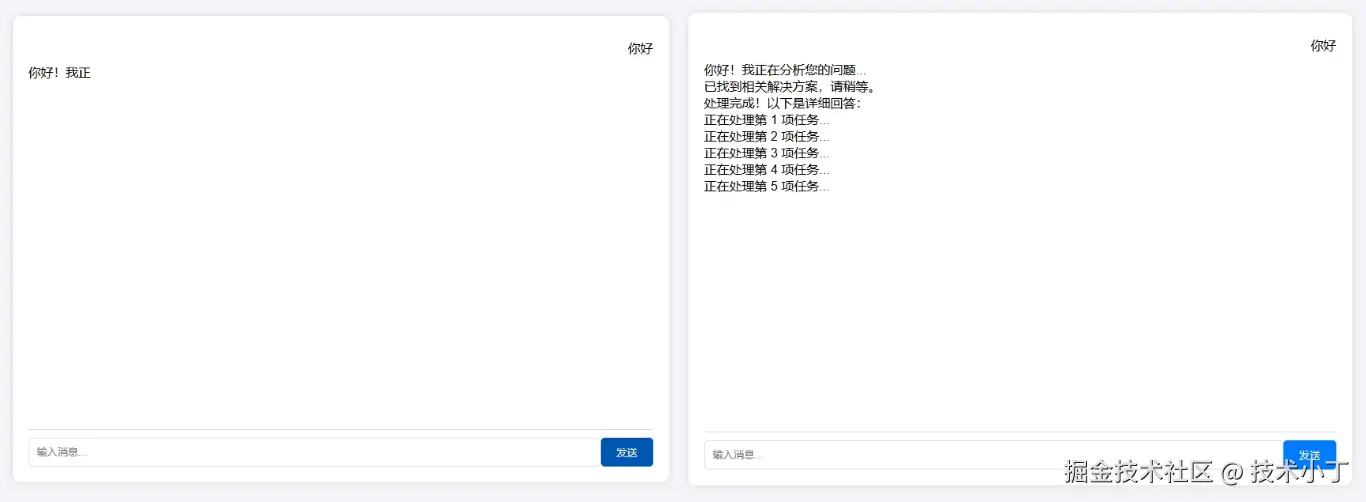
效果演示
后端代码
|
1 2 3 4 5 6 7 8 9 10 11 12 13 14 15 16 17 18 19 20 21 22 23 24 25 26 27 28 29 30 31 32 33 34 35 36 37 38 39 40 |
<?php // 关闭输出缓冲 ini_set('output_buffering', 'off'); ini_set('zlib.output_compression', false); while (ob_get_level()) ob_end_clean(); // 清除所有缓冲层
// 设置HTTP头(流式内容类型 + 禁用缓存) header('Content-Type: text/plain; charset=utf-8'); header('Cache-Control: no-cache'); header('X-Accel-Buffering: no');
// 模拟对话回复内容 $messages = [ "你好!我正在分析您的问题...\n", "已找到相关解决方案,请稍等。\n", "处理完成!以下是详细回答:\n" ];
// 流式输出每条消息 foreach ($messages as $msg) { // 逐字输出(可选) // $length = strlen($msg); $length = mb_strlen($msg); for ($i=0; $i<$length; $i++) { // echo $msg[$i]; $char = mb_substr($msg, $i, 1, 'UTF-8'); echo $char; ob_flush(); // 刷新PHP缓冲 flush(); // 刷新Web服务器缓冲 usleep(50000); // 50ms延迟模拟打字效果 } }
// 持续生成内容的例子(如从数据库/API获取) for ($i=1; $i<=5; $i++) { echo "正在处理第 {$i} 项任务...\n"; ob_flush(); flush(); sleep(1); } |
前端代码
|
1 2 3 4 5 6 7 8 9 10 11 12 13 14 15 16 17 18 19 20 21 22 23 24 25 26 27 28 29 30 31 32 33 34 35 36 37 38 39 40 41 42 43 44 45 46 47 48 49 50 51 52 53 54 55 56 57 58 59 60 61 62 63 64 65 66 67 68 69 70 71 72 73 74 75 76 77 78 79 80 81 82 83 84 85 86 87 88 89 90 91 92 93 94 95 96 97 98 99 100 101 102 103 104 105 106 107 108 109 110 111 |
<!DOCTYPE html> <html lang="en"> <head> <meta charset="UTF-8"> <meta name="viewport" content="width=device-width, initial-scale=1.0"> <title>智能客服系统</title> <style> body { font-family: Arial, sans-serif; display: flex; justify-content: center; align-items: center; height: 100vh; margin: 0; background-color: #f4f4f9; } .chat-container { width: 800px; background-color: #fff; border-radius: 10px; box-shadow: 0 0 10px rgba(0, 0, 0, 0.1); padding: 20px; } .messages { height: 500px; overflow-y: auto; border-bottom: 1px solid #ddd; padding-bottom: 10px; } .message { margin: 10px 0; } .user { text-align: right; } .bot { text-align: left; } .input-container { display: flex; margin-top: 10px; } .input-container input { flex: 1; padding: 10px; border: 1px solid #ddd; border-radius: 5px; } .input-container button { padding: 10px 20px; border: none; background-color: #007bff; color: #fff; border-radius: 5px; cursor: pointer; } .input-container button:hover { background-color: #0056b3; } </style> </head> <body> <div class="chat-container"> <div class="messages" id="messages" style="white-space: pre-wrap;"></div> <div class="input-container"> <input type="text" id="userInput" placeholder="输入消息..."> <button onclick="sendMessage()">发送</button> </div> </div>
<script> function sendMessage() { const userInput = document.getElementById('userInput').value; if (userInput.trim() === '') return; document.getElementById('userInput').value = '';
const messagesContainer = document.getElementById('messages'); const userMessage = document.createElement('div'); userMessage.className = 'message user'; userMessage.textContent = userInput; messagesContainer.appendChild(userMessage);
fetch('stream.php') .then(response => { const reader = response.body.getReader(); const decoder = new TextDecoder('utf-8');
const botMessage = document.createElement('div'); botMessage.className = 'message bot'; messagesContainer.appendChild(botMessage);
function readChunk() { return reader.read().then(({ done, value }) => { if (done) return; // 将二进制数据解码为文本 const text = decoder.decode(value); // 实时追加到页面 botMessage.innerHTML += text; messagesContainer.scrollTop = messagesContainer.scrollHeight; // 继续读取下一块 return readChunk(); }); } return readChunk(); }) .catch(console.error); } </script> </body> </html> |
运行测试
项目根目录下打开命令行输入以下命令,执行
|
1 |
php -S 127.0.0.1:6789 |
打开浏览器,输入 127.0.0.1:6789 访问Web界面,输入任意内容发送后,即可看到流式输出效果
原理解析
1. 什么是流式输出
流式输出通常指的是在数据生成的同时逐步发送到客户端,而不是等待所有处理完成后再一次性发送。这在实时聊天应用或需要逐步显示结果的场景中很常见。
2. PHP怎么做到流式输出
PHP默认是缓冲输出的,也就是说,脚本执行完毕后才会将内容发送到浏览器。所以需要调整输出缓冲的设置。比如调用ob_flush()和flush()来实时发送内容。
3. 前端处理数据的接收和显示
前端监听来自服务器的事件,每次接收到数据就更新页面。本次实践通过Fetch读取流式响应体,逐块处理。
