在 PHP 开发中,GD 库是处理图像的核心利器:生成验证码、制作缩略图、添加水印、绘制简单图表…… 这些高频需求都能通过 GD 库轻松实现。
开启需修改 php.ini,取消 extension=gd(Windows)或 extension=gd.so(Linux)前的注释,重启 Web 服务即可。
GD 库基本操作流程
所有 GD 操作都遵循 “创建画布 → 分配颜色 → 绘制内容 → 输出 / 保存 → 销毁资源” 的流程:
|
1
2
3
4
5
6
7
8
9
10
11
12
13
14
15
16
17
18
19
20
21
|
<?php
// 1. 创建画布(宽 400,高 200)
$image = imagecreatetruecolor(400, 200);
// 2. 分配颜色(RGB 值)
$white = imagecolorallocate($image, 255, 255, 255); // 白色
$black = imagecolorallocate($image, 0, 0, 0); // 黑色
// 3. 填充背景色
imagefill($image, 0, 0, $white);
// 4. 绘制内容(比如写一行字)
imagestring($image, 5, 100, 90, 'Hello GD!', $black);
// 5. 输出图像(或保存到文件)
header('Content-Type: image/png'); // 告诉浏览器输出的是 PNG 图片
imagepng($image);
// 6. 销毁资源,释放内存
imagedestroy($image);
?>
|
常用功能
绘制基本图形
GD 库支持绘制直线、矩形、圆形、椭圆等基础图形,适合制作简单图表或标记。
| 函数 |
说明 |
| imageline() |
绘制直线 |
| imagerectangle() |
绘制矩形(边框) |
| imagefilledrectangle() |
绘制填充矩形 |
| imageellipse() |
绘制椭圆(圆形是椭圆的特例) |
| imagefilledellipse() |
绘制填充椭圆 |
|
1
2
3
4
5
6
7
8
9
10
11
12
13
14
15
16
17
18
19
20
21
22
23
24
25
26
|
// 创建画布
$image = imagecreatetruecolor(400, 300);
$white = imagecolorallocate($image, 255, 255, 255);
$red = imagecolorallocate($image, 255, 0, 0);
$blue = imagecolorallocate($image, 0, 0, 255);
$green = imagecolorallocate($image, 0, 255, 0);
// 填充白色背景
imagefill($image, 0, 0, $white);
// 1. 绘制红色直线(从 x1,y1 到 x2,y2)
imageline($image, 50, 50, 350, 50, $red);
// 2. 绘制蓝色矩形边框(x1,y1 左上角,x2,y2 右下角)
imagerectangle($image, 50, 80, 150, 180, $blue);
// 3. 绘制绿色填充矩形
imagefilledrectangle($image, 200, 80, 350, 180, $green);
// 4. 绘制红色填充圆形(圆心 x,y,宽高相同即为圆)
imagefilledellipse($image, 200, 240, 80, 80, $red);
// 输出图像
header('Content-Type: image/png');
imagepng($image);
imagedestroy($image);
|
生成缩略图
网站上传图片时,生成缩略图是刚需。GD 库通过 imagecopyresampled() 实现高质量缩放。
- imagecreatefromjpeg() / imagecreatefrompng():从现有图片创建画布资源。
- imagecopyresampled():重采样复制图像(比 imagecopyresized() 更清晰,推荐使用)。
|
1
2
3
4
5
6
7
8
9
10
11
12
13
14
15
16
17
18
19
20
21
22
23
24
25
26
27
28
29
30
31
32
33
34
35
36
37
38
39
40
41
42
43
44
45
46
47
48
49
50
51
52
53
54
55
56
57
58
59
60
61
|
/**
* 生成等比例缩略图
* @param string $srcPath 原图路径
* @param string $destPath 缩略图保存路径
* @param int $maxWidth 最大宽度
* @param int $maxHeight 最大高度
*/
function createThumbnail($srcPath, $destPath, $maxWidth = 200, $maxHeight = 200) {
// 获取原图信息
list($srcWidth, $srcHeight, $type) = getimagesize($srcPath);
// 根据图片类型创建画布
switch ($type) {
case IMAGETYPE_JPEG:
$srcImage = imagecreatefromjpeg($srcPath);
break;
case IMAGETYPE_PNG:
$srcImage = imagecreatefrompng($srcPath);
break;
default:
return false;
}
// 计算等比例缩放后的尺寸
$scale = min($maxWidth / $srcWidth, $maxHeight / $srcHeight);
$destWidth = $srcWidth * $scale;
$destHeight = $srcHeight * $scale;
// 创建缩略图画布
$destImage = imagecreatetruecolor($destWidth, $destHeight);
// 处理 PNG 透明背景(可选,若不需要可省略)
if ($type == IMAGETYPE_PNG) {
$transparent = imagecolorallocatealpha($destImage, 255, 255, 255, 127);
imagefill($destImage, 0, 0, $transparent);
imagesavealpha($destImage, true);
}
// 重采样复制(核心步骤)
imagecopyresampled(
$destImage, $srcImage, // 目标画布、源画布
0, 0, 0, 0, // 目标 x,y、源 x,y
$destWidth, $destHeight,// 目标宽高
$srcWidth, $srcHeight // 源宽高
);
// 保存缩略图
switch ($type) {
case IMAGETYPE_JPEG:
imagejpeg($destImage, $destPath, 90); // 90 是 JPEG 质量
break;
case IMAGETYPE_PNG:
imagepng($destImage, $destPath);
break;
}
// 销毁资源
imagedestroy($srcImage);
imagedestroy($destImage);
return true;
}
|
添加水印
文字水印
|
1
2
3
4
5
6
7
8
9
10
11
12
13
14
15
16
17
18
19
20
21
22
23
24
25
26
27
28
29
30
31
32
33
34
35
36
37
38
39
40
41
42
43
44
45
46
47
48
49
50
|
/**
* 添加文字水印
* @param string $srcPath 原图路径
* @param string $text 水印文字
* @param string $fontPath 字体文件路径(需支持中文,比如 simhei.ttf)
*/
function addTextWatermark($srcPath, $text, $fontPath = './simhei.ttf') {
// 获取原图信息
list($width, $height, $type) = getimagesize($srcPath);
switch ($type) {
case IMAGETYPE_JPEG:
$image = imagecreatefromjpeg($srcPath);
break;
case IMAGETYPE_PNG:
$image = imagecreatefrompng($srcPath);
break;
default:
return false;
}
// 分配水印颜色(半透明白色)
$watermarkColor = imagecolorallocatealpha($image, 255, 255, 255, 50); // 50 是透明度(0-127,越大越透明)
// 设置字体大小
$fontSize = 20;
// 计算文字位置(右下角)
$bbox = imagettfbbox($fontSize, 0, $fontPath, $text);
$textWidth = $bbox[2] - $bbox[0];
$textHeight = $bbox[1] - $bbox[7];
$x = $width - $textWidth - 20; // 距离右边 20px
$y = $height - $textHeight - 20; // 距离下边 20px
// 写入文字(使用 TrueType 字体,支持中文)
imagettftext($image, $fontSize, 0, $x, $y, $watermarkColor, $fontPath, $text);
// 保存图片
$destPath = './watermark_text.jpg';
switch ($type) {
case IMAGETYPE_JPEG:
imagejpeg($image, $destPath, 90);
break;
case IMAGETYPE_PNG:
imagepng($image, $destPath);
break;
}
imagedestroy($image);
return $destPath;
}
|
图片水印
|
1
2
3
4
5
6
7
8
9
10
11
12
13
14
15
16
17
18
19
20
21
22
23
24
25
26
27
28
29
30
31
32
33
34
35
36
37
38
39
40
41
42
43
44
45
|
/**
* 添加图片水印
* @param string $srcPath 原图路径
* @param string $watermarkPath 水印图片路径(建议 PNG 透明图)
*/
function addImageWatermark($srcPath, $watermarkPath) {
// 获取原图和水印图信息
list($srcWidth, $srcHeight, $srcType) = getimagesize($srcPath);
list($wmWidth, $wmHeight, $wmType) = getimagesize($watermarkPath);
// 创建画布
switch ($srcType) {
case IMAGETYPE_JPEG:
$srcImage = imagecreatefromjpeg($srcPath);
break;
case IMAGETYPE_PNG:
$srcImage = imagecreatefrompng($srcPath);
break;
default:
return false;
}
$wmImage = imagecreatefrompng($watermarkPath); // 假设水印是 PNG
// 计算水印位置(右下角)
$x = $srcWidth - $wmWidth - 20;
$y = $srcHeight - $wmHeight - 20;
// 合并水印(保留 PNG 透明度)
imagecopy($srcImage, $wmImage, $x, $y, 0, 0, $wmWidth, $wmHeight);
// 保存图片
$destPath = './watermark_image.jpg';
switch ($srcType) {
case IMAGETYPE_JPEG:
imagejpeg($srcImage, $destPath, 90);
break;
case IMAGETYPE_PNG:
imagepng($srcImage, $destPath);
break;
}
imagedestroy($srcImage);
imagedestroy($wmImage);
return $destPath;
}
|
生成验证码
验证码是防止恶意注册、刷接口的常用手段,GD 库生成验证码的核心是 “随机字符 + 干扰线 + 噪点”。
|
1
2
3
4
5
6
7
8
9
10
11
12
13
14
15
16
17
18
19
20
21
22
23
24
25
26
27
28
29
30
31
32
33
34
35
36
37
38
39
40
41
42
43
44
45
46
47
48
49
50
51
52
53
|
<?php
session_start(); // 开启 Session,用于保存验证码
// 1. 创建画布
$width = 120;
$height = 40;
$image = imagecreatetruecolor($width, $height);
// 2. 分配颜色
$white = imagecolorallocate($image, 255, 255, 255);
$gray = imagecolorallocate($image, 200, 200, 200);
$darkGray = imagecolorallocate($image, 100, 100, 100);
// 3. 填充背景
imagefill($image, 0, 0, $white);
// 4. 绘制干扰线(3 条)
for ($i = 0; $i < 3; $i++) {
$lineColor = imagecolorallocate($image, rand(100, 200), rand(100, 200), rand(100, 200));
imageline($image, rand(0, $width), rand(0, $height), rand(0, $width), rand(0, $height), $lineColor);
}
// 5. 绘制噪点(50 个)
for ($i = 0; $i < 50; $i++) {
$dotColor = imagecolorallocate($image, rand(50, 150), rand(50, 150), rand(50, 150));
imagesetpixel($image, rand(0, $width), rand(0, $height), $dotColor);
}
// 6. 生成随机验证码
$chars = '23456789abcdefghjkmnpqrstuvwxyzABCDEFGHJKLMNPQRSTUVWXYZ'; // 去掉易混淆的 0、1、O、l
$code = '';
for ($i = 0; $i < 4; $i++) {
$code .= $chars[rand(0, strlen($chars) - 1)];
}
// 保存到 Session,用于后续验证
$_SESSION['captcha'] = strtolower($code);
// 7. 写入验证码文字
$fontSize = 16;
$fontPath = './simhei.ttf'; // 可选,若没有可用 imagestring
for ($i = 0; $i < 4; $i++) {
$charColor = imagecolorallocate($image, rand(0, 100), rand(0, 100), rand(0, 100));
$x = 15 + $i * 25;
$y = rand(25, 35);
imagettftext($image, $fontSize, rand(-10, 10), $x, $y, $charColor, $fontPath, $code[$i]);
}
// 8. 输出图像
header('Content-Type: image/png');
imagepng($image);
imagedestroy($image);
?>
|
注意事项
- 记得销毁资源:每次 GD 操作后,务必用 imagedestroy() 销毁图像资源,避免内存泄漏。
- 输出前无任何输出:在 header('Content-Type: image/png') 前,不能有任何 HTML 标签、空格或换行,否则会导致图像无法显示。
- 处理大图片注意内存:处理高分辨率图片时,可能会超出 PHP 内存限制,可在代码开头临时调整:ini_set('memory_limit', '256M');。
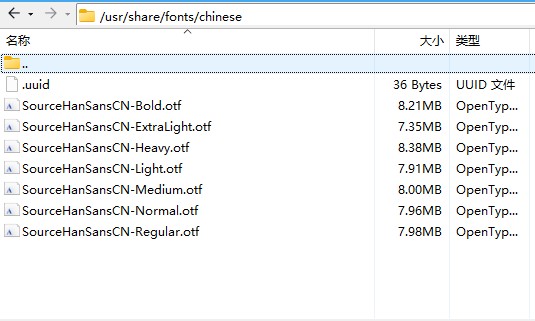
- 中文支持用 TrueType 字体:imagestring() 不支持中文,需用 imagettftext() 配合 .ttf 字体文件(如 simhei.ttf 黑体)。
- 优先使用 imagecopyresampled() :缩放图片时,imagecopyresampled() 会进行重采样,生成的缩略图更清晰,不要用 imagecopyresized()。
|