nginx:stable镜像的使用
以前使用的nginx:stable-alpine
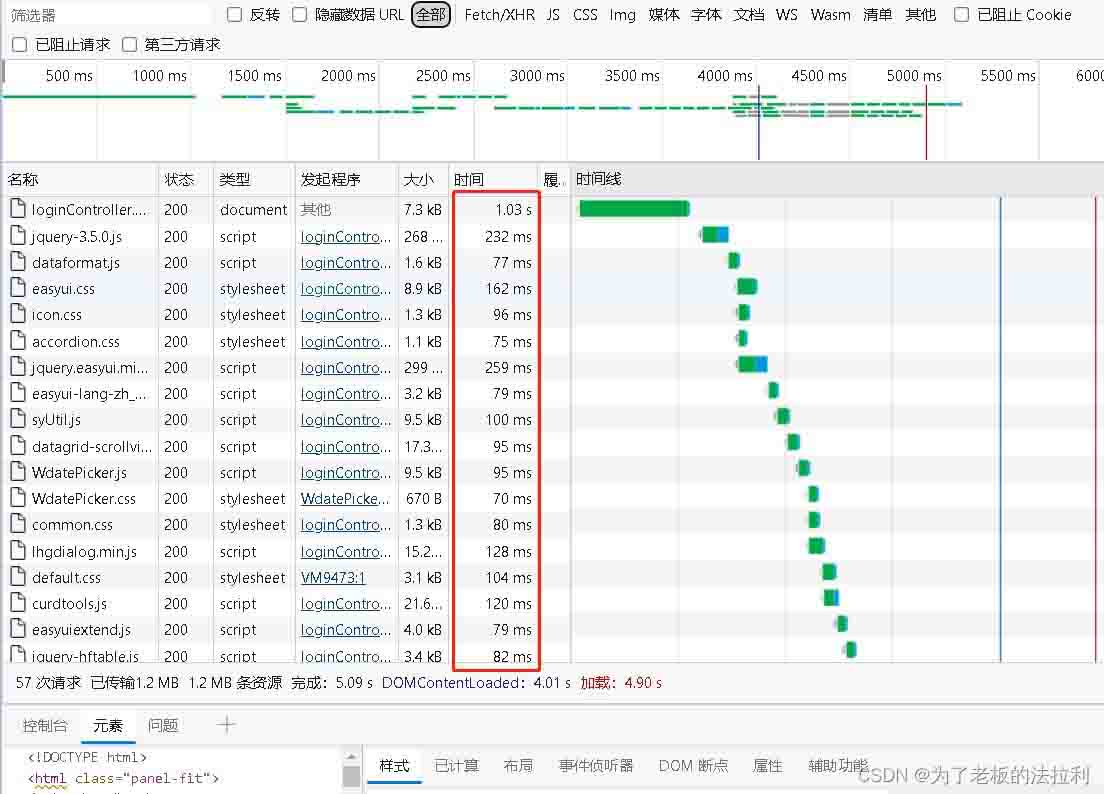
但是https加载很慢,所以尝试换成 nginx:stable,结果不仅https 快了,页面加载和接口调用都快了
|
1 2 3 4 5 6 7 8 9 10 11 12 13 14 15 16 17 18 19 20 21 22 23 |
docker run -d \ --name nginx-stable \ --restart unless-stopped \ --network app \ --hostname nginx \ -p 80:80 \ -p 443:443 \ -e TZ=Asia/Shanghai \ -e NGINX_ENTRYPOINT_QUIET_LOGS=1 \ -v /opt/docker-data/nginx/log:/etc/nginx/logs \ -v /opt/docker-data/nginx/static:/usr/share/nginx/html:ro \ -v /opt/docker-data/nginx/https-cert:/etc/nginx/https-cert:ro \ -v /opt/docker-data/nginx/conf/nginx.conf:/etc/nginx/nginx.conf:ro \ -v /opt/docker-data/nginx/conf/conf.d:/etc/nginx/conf.d:ro \ -v /opt/docker-data/nginx/conf/sites-available:/etc/nginx/sites-available:ro \ -v /opt/docker-data/nginx/conf/sites-enabled:/etc/nginx/sites-enabled:ro \ -v /opt/docker-data/nginx/cache:/var/cache/nginx \ --ulimit nofile=65536:65536 \ --sysctl net.core.somaxconn=65535 \ --cpus 2 \ --memory 1g \ --memory-swap 1g \ nginx:stable |
|
1 |
docker logs -f -t --tail 50 nginx-stable |
在宿主机 /opt/docker-data/nginx/ 下新建一下文件夹
|
1 |
static sites-enabled sites-available log https-cert conf cache |
在 conf 文件夹下新建 nginx.conf文件 和 conf.d 文件夹
nginx.conf 文件内容
|
1 2 3 4 5 6 7 8 9 10 11 12 13 14 15 16 17 18 19 20 21 22 23 24 25 26 27 28 29 30 31 32 33 34 35 36 37 38 39 40 41 42 43 44 45 46 47 48 49 50 51 52 53 54 55 56 57 58 59 60 61 62 63 64 65 66 67 68 69 70 71 72 73 74 75 76 77 78 79 80 81 |
#user nobody; # worker 数和服务器的 cpu 数相等是最为适宜的。 # 设少了会浪费 cpu,设多了会造成 cpu 频繁切换上下文带来的损耗。 worker_processes 2;
# work 绑定 cpu(4 work 绑定 4cpu)。 # worker_cpu_affinity 0001 0010 0100 1000 # work 绑定 cpu (4 work 绑定 8cpu 中的 4 个) 。 # worker_cpu_affinity 0000001 00000010 00000100 00001000
#error_log logs/error.log; #error_log logs/error.log notice; error_log /etc/nginx/logs/error.log warn;
pid /tmp/nginx.pid;
events { # 普通的静态访问最大并发数建议:worker_connections * worker_processes / 2 # 作为反向代理来说,最大并发数量建议 worker_connections * worker_processes / 4 # 因为作为反向代理服务器,每个并发会建立与客户端的连接和与后端服务的连接,会占用两个连接。 worker_connections 1024; }
http { server_tokens off; include mime.types; default_type application/octet-stream;
log_format main '$remote_addr - $remote_user [$time_local] "$request" ' '$status $body_bytes_sent "$http_referer" ' '"$http_user_agent" "$http_x_forwarded_for"';
#access_log logs/access.log main; access_log /etc/nginx/logs/access.log;
sendfile on; #tcp_nopush on;
#keepalive_timeout 0; keepalive_timeout 65;
gzip on;
# 关闭etag,比较消耗性能,仅使用Last-Modified etag off;
# 设置允许压缩的页面最小字节数; 这里表示如果文件小于这个大小,就不用压缩,因为没有意义,本来就很小. gzip_min_length 2k;
# 设置压缩比率,最小为1,处理速度快,传输速度慢;9为最大压缩比,处理速度慢,传输速度快; # 这里表示压缩级别,可以是0到9中的任一个,级别越高,压缩就越小,节省了带宽资源,但同时也消耗CPU资源,所以一般折中为6 gzip_comp_level 6; # 指定压缩的文件类型 gzip_types text/plain application/x-javascript text/css application/xml text/javascript application/x-httpd-php application/javascript application/json;
limit_conn_log_level error; limit_conn_status 429; limit_req_status 429;
# 设置了名为 ip_conn_pool 的存储区,大小为20兆字节,根据IP地址 limit_conn_zone $binary_remote_addr zone=ip_conn_pool:32m; # 设置了名为 per_server_pool 的存储区,大小为20兆字节,根据server limit_conn_zone $server_name zone=per_server_pool:32m; limit_req_zone $binary_remote_addr zone=api_limit:256m rate=20r/s; # 其中$binary_remote_addr有时需要根据自己已有的log_format变量配置进行替换
#server { # listen 80 default_server; # listen 443 default_server; # server_name _; # ssl_reject_handshake on; # return 444; #}
client_max_body_size 50m;
include /etc/nginx/conf.d/*.conf; } |
在conf.d 文件夹下新建jszj.conf
jszj.conf 文件内容
|
1 2 3 4 5 6 7 8 9 10 11 12 13 14 15 16 17 18 19 20 21 22 23 24 25 26 27 28 29 30 31 32 33 34 35 36 37 38 39 40 41 42 43 44 45 46 47 48 49 50 51 52 53 54 55 56 57 58 59 60 61 62 63 64 65 66 67 68 69 70 71 72 73 74 75 76 77 78 79 80 81 82 83 84 85 86 87 88 89 90 91 92 93 94 95 96 97 98 99 100 101 102 103 104 105 106 107 108 109 110 |
server { listen 80; #listen 8001; listen 443 ssl; http2 on;
ssl_certificate /etc/nginx/https-cert/jnajszj.mmwzcloud.com.pem; ssl_certificate_key /etc/nginx/https-cert/jnajszj.mmwzcloud.com.key;
server_name jszj.mmwzcloud.com default_server;
# 1. 优化 SSL 配置 ssl_protocols TLSv1.2 TLSv1.3; ssl_ciphers 'TLS_AES_128_GCM_SHA256:TLS_AES_256_GCM_SHA384:TLS_CHACHA20_POLY1305_SHA256:ECDHE-ECDSA-AES128-GCM-SHA256:ECDHE-RSA-AES128-GCM-SHA256:ECDHE-ECDSA-AES256-GCM-SHA384:ECDHE-RSA-AES256-GCM-SHA384'; ssl_prefer_server_ciphers off;
# 2. 优化会话缓存 ssl_session_cache shared:SSL:10m; # 减小到 10m ssl_session_timeout 1h; ssl_session_tickets on;
# 3. 禁用有问题的功能 ssl_stapling off; ssl_stapling_verify off;
# 4. 关键优化:减小缓冲区 ssl_buffer_size 4k; # 从 16k 改为 4k
# 防止 MIME 类型混淆攻击 add_header X-Content-Type-Options nosniff;
proxy_set_header X-Real-IP $remote_addr; proxy_set_header X-Forwarded-For $proxy_add_x_forwarded_for; proxy_set_header Host $host; proxy_redirect off;
location /api/ { proxy_hide_header Access-Control-Allow-Origin; add_header Access-Control-Allow-Origin *; add_header "Access-Control-Allow-Headers" "Authorization, Origin, X-Requested-With, Content-Type, Accept"; add_header Access-Control-Allow-Methods GET,POST,OPTIONS,HEAD,PUT,DELETE; add_header Access-Control-Allow-Credentials false; if ($request_method = OPTIONS) { return 204; }
proxy_set_header X-Forwarded-For $proxy_add_x_forwarded_for; proxy_set_header Host $host; proxy_set_header X-Real-IP $remote_addr; proxy_set_header X-Forwarded-Proto $scheme; # 重要!告诉后端是 HTTPS
proxy_pass http://jszj:38080/; #proxy_pass http://www.baidu.com/; }
#h5项目 location /apph/ { alias /usr/share/nginx/html/apph/; # VUE History 模式下刷新网页404问题 try_files $uri $uri/ /apph/index.html; index index.html; #expires 12h; add_header Cache-Control "no-cache,must-revalidate"; error_log /etc/nginx/logs/error.log; access_log /etc/nginx/logs/access.log; }
#h5项目 location /static-file/ { alias /usr/share/nginx/html/static-file/; # VUE History 模式下刷新网页404问题 #try_files $uri $uri/ /apph/index.html; #index index.html; #expires 12h; add_header Cache-Control "no-cache,must-revalidate"; error_log /etc/nginx/logs/error.log; access_log /etc/nginx/logs/access.log; }
#后台管理 location / { # 项目在 /usr/share/nginx/html/vue-admin 目录 root /usr/share/nginx/html/vue-admin; index index.html;
# 修正 try_files,避免循环 try_files $uri $uri/ /index.html;
add_header Cache-Control "no-cache,must-revalidate"; error_log /etc/nginx/logs/error.log; access_log /etc/nginx/logs/access.log; }
error_page 429 /429; location = /429 { default_type application/json; return 429 '{"code":429,"message":"当前访问人数过多, 请稍后再试"}'; }
error_page 502 /server_shutdown; error_page 503 /server_shutdown; location = /server_shutdown { default_type application/json; return 502 '{"code":502,"message":"服务器升级维护中, 请稍后再试"}'; } } |