
Mac OS上安装PostgreSQL完整图文教程

macOS 上安装 PostgreSQL(完整图文教程) 适用于macOS 12+(Monterey / Ventura / Sonoma / Sequoia),支持Apple Silicon(M1/M2/M3)和Intel 推荐使用Homebrew(最简单、最常用) 一、推荐方式:使用 Homebrew 安装(
macOS 上安装 PostgreSQL(完整图文教程)
一、推荐方式:使用 Homebrew 安装(99% 用户选这个)1. 安装 Homebrew(如果还没装)打开 终端(Terminal),粘贴运行:
2. 安装 PostgreSQL
3. 启动 PostgreSQL 服务
4. 设置开机自启(可选)
5. 验证安装成功
在 psql 中运行:
二、其他安装方式(了解即可)
三、Postgres.app 方式(适合新手 / 想图形化启动)
四、图形化管理工具(推荐安装一个)方式 1:安装 pgAdmin 4(官方 GUI)
方式 2:DBeaver(免费多数据库 GUI)
五、Homebrew 版 PostgreSQL 重要路径
六、设置密码 & 创建用户(推荐)Homebrew 安装的 PostgreSQL 默认无密码,通过本地 socket 认证。 设置postgres角色密码:
创建应用专用用户和数据库
测试连接:
七、允许远程连接(开发/测试用)1. 修改监听地址
找到并修改:
2. 修改认证方式
末尾添加:
3. 重启服务
4. 开放 macOS 防火墙(系统设置 → 网络 → 防火墙)或命令行:
八、常用命令总结(终端)
九、备份与恢复
十、卸载 PostgreSQL(彻底清理)
十一、常见问题(FAQ)
十二、学习资源
恭喜!你已成功在 macOS 上安装 PostgreSQL! |
您可能感兴趣的文章 :

-
mysql覆盖索引的项目实践
在 MySQL 中,覆盖索引(Covering Index)是一种非常重要的查询优化技术。它的核心思想是:一个索引包含了查询所需的所有字段,因此 MySQL 可 -
Mac OS上安装PostgreSQL完整图文教程
macOS 上安装 PostgreSQL(完整图文教程) 适用于macOS 12+(Monterey / Ventura / Sonoma / Sequoia),支持Apple Silicon(M1/M2/M3)和Intel 推荐使用Homebrew(最 -
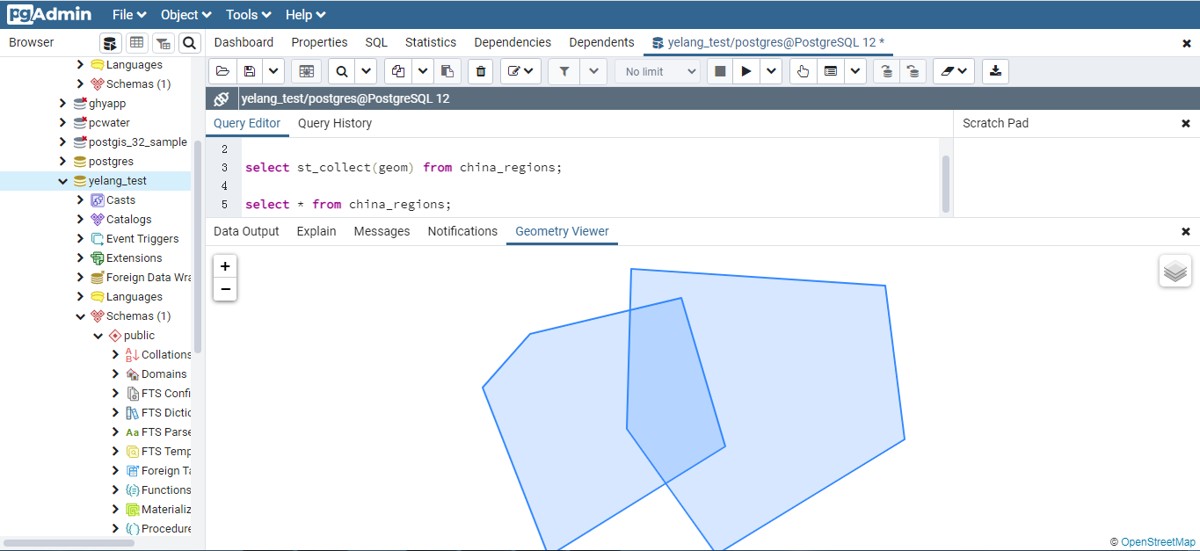
PostGIS中ST_Union与ST_Collect的区别与使用
在地理空间数据库领域,PostGIS作为PostgreSQL的扩展,为地理空间数据的存储、查询和分析提供了强大的功能。对于初入PostGIS世界的新手来说 -
对postgresql日期和时间的比较
postgresql日期和时间比较 DB里保存到时分秒,需要和年月日比较 1 2 3 select date_trunc(day,now())=date_trunc(day,date(20200615)) --true select date_trunc(day,dat -
PostgreSQL中查看当前时间和日期的几种常用方法
PostgreSQL中查看当前时间和日期 CURRENT_TIMESTAMP CURRENT_TIMESTAMP返回当前的日期和时间,包含时间戳信息,包括时区信息。 1 SELECT CURRENT_TIMESTAMP -
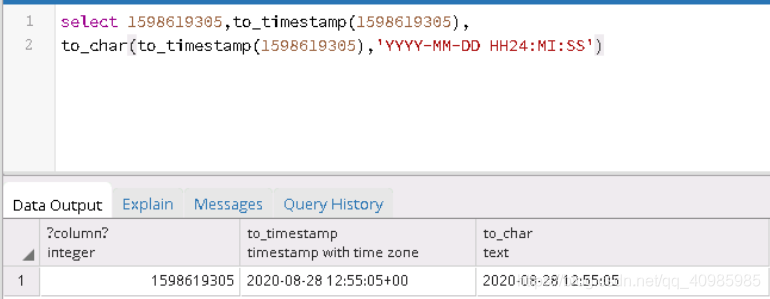
Postgresql之时间戳long,TimeStamp,Date,String互转方式
时间戳long,TimeStamp,Date,String互转 今天遇到一个神奇的问题: Postgre数据库里存的 10位long类型的时间戳,拿Java代码转完的日期年月日时分秒, -
postgresql使用dblink跨库增删改查的详细步骤
postgresql使用dblink跨库增删改查 一、使用步骤 1、创建dblink扩展,连接与被连接的两个数据库都要执行下面sql 1 create extension if not exists dblin -
PostgreSQL中json数据类型介绍
前言 JSON(JavaScript Object Notation)是一种轻量级的数据交换格式。它基于 ECMAScript(European Computer Manufacturers Association, 欧洲计算机协会制定的 -
postgresql使用dblink跨库增删改查的步骤介绍
postgresql使用dblink跨库增删改查 一、使用步骤 1、创建dblink扩展,连接与被连接的两个数据库都要执行下面sql 1 create extension if not exists dblin


-
postgresql使用dblink跨库增删改查的详细
2023-09-30
-
Postgresql之时间戳long,TimeStamp,Date,Stri
2024-02-11
-
在Centos8-stream安装PostgreSQL13的教程
2022-02-26
-
postgresql13主从搭建Ubuntu的教程
2022-11-24
-
PostgreSQL HOT与PHOT有哪些区别
2022-09-22

